The original paintjob was still intact. In it's time, I'm sure it was stunning. An ivory paint with dark gold antiquing and even little gold flecks dispersed throughout... but back then (our technician thinks 1900ish) they used polyurethane as a finish coat and over the years, the gorgeous paintjob turned a nasty yellow. But despite the overall appearance, the sound is amazing. So full and beautiful. As soon as the movers pulled out of my driveway, I began to play. I would be lying if I told you I didn't cry a little bit, as cheesy as that may sound. I haven't had a piano to play for 11 years.


I really did hate to sand off the beautiful original paint job... but it would have looked terrible in my house. And so I began...
I followed a tutorial from this blogpost here to guide me along... http://www.allthingsthrifty.com/2010/08/piano-refinishing-complete.html
I took all the panels off, then I removed all of the keys.


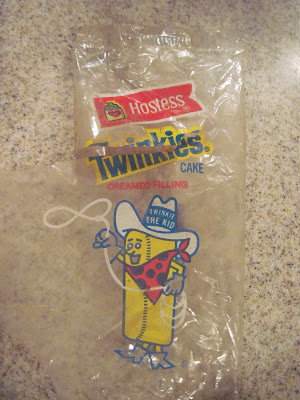
It was NASTY under there... I found a couple of hidden treasures:
old twinkies wrapper, featuring "Twinkie the Kid"...
Then I covered the action and the back with brown paper and painter's tape. Next, I sanded the ENTIRE thing down until all the polyeurothane finish was off. Then I strapped on a gas mask (literally, I used a gas mask, trying to keep the bebe safe you know. AND I opened the garage door all the way, duh.) and applied the primer.


Then I sanded AGAIN! The particular primer the tutorial called for has to be sanded after application. Oh my gosh, I can't tell you how much I hated this particular part of the process. Ugh.
Next, came the easy part. The actual painting. I applied a few coats and let it dry overnight.
And last, but not least, I antiqued it with faux glaze mixed with black paint. This took me forever too because I kept messing up and wiping it all off and starting over. And over. And over. But... it was so worth it. And all the hard work and late nights I put into it make it even that much more dear to my heart. I love this piano!!!

Here's a close-up so you can see what the antiquing looks like. I wanted it to be subtle.


 This piano was purchased from some funds I received from my late Dad. :) He has wanted to buy me a piano ever since I moved out of my childhood home and was almost apologetic every time he handed me a gift for my birthday or Christmas... always prefacing it with, "Well Honey, it's not a piano, but...". (Poor guy, I really did love all of his sweet, thoughtful presents anyway, and never felt like he should buy me a piano.) So thanks, Daddy. I will cherish it as long as I live. :)


2 comments:
It looks amazing!!! I can't wait to see it in person!
That piano is GORGEOUS! Great job! AMAZING!
Post a Comment